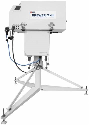
brewer_shipping
Differences
This shows you the differences between two versions of the page.
| Both sides previous revisionPrevious revision | |||
| brewer_shipping [2026/05/15 13:31] – andrew | brewer_shipping [2026/05/15 13:34] (current) – andrew | ||
|---|---|---|---|
| Line 74: | Line 74: | ||
| 5. Install the UV dome protector cap onto the UV dome. | 5. Install the UV dome protector cap onto the UV dome. | ||
| + | |||
| + | {{ : | ||
| 6. Detach the Brewer from the tracker by removing the 4 bolts that thread up into the rubber Brewer feet. The Brewer is heavy and awkward, have someone help you move the Brewer to the area you will use for packing the Brewer. | 6. Detach the Brewer from the tracker by removing the 4 bolts that thread up into the rubber Brewer feet. The Brewer is heavy and awkward, have someone help you move the Brewer to the area you will use for packing the Brewer. | ||
| Line 79: | Line 81: | ||
| 7. Affix the piece of stiff foam marked “Zenith Window” over the zenith prism window with electrical tape. | 7. Affix the piece of stiff foam marked “Zenith Window” over the zenith prism window with electrical tape. | ||
| + | |||
| + | {{ : | ||
| 8. Remove the Brewer cover. Manually rotate the zenith prism down to the lamps by turning the brass combination gear mated to the small motor gear. | 8. Remove the Brewer cover. Manually rotate the zenith prism down to the lamps by turning the brass combination gear mated to the small motor gear. | ||
| - | | + | |
| + | {{ : | ||
| 9. The piece of foam marked “Gear” has a split in it. Slide that piece of foam over the top part of the split-gear (upper most gear) in the zenith drive assembly to prevent the split gear from being damaged by impacting against the Brewer cover during travel. | 9. The piece of foam marked “Gear” has a split in it. Slide that piece of foam over the top part of the split-gear (upper most gear) in the zenith drive assembly to prevent the split gear from being damaged by impacting against the Brewer cover during travel. | ||
| + | |||
| + | {{ : | ||
| 10. Insert the piece of foam labelled “Under Spec. Housing”, between the spectrometer case and case base or the heat sink assembly if it is an older single Brewer. | 10. Insert the piece of foam labelled “Under Spec. Housing”, between the spectrometer case and case base or the heat sink assembly if it is an older single Brewer. | ||
| - | + | ||
| + | {{ : | ||
| 11. Place the piece of foam Marked “Viewing Window” and the bag that contained all the foam over the control panel and filter wheels. | 11. Place the piece of foam Marked “Viewing Window” and the bag that contained all the foam over the control panel and filter wheels. | ||
| + | |||
| + | {{ : | ||
| 12. Use elastics to ensure the container of desiccant inside the instrument cannot open during shipping. Also secure the desiccant tray in place with elastics or cable ties to ensure the tray cannot move around during shipping. | 12. Use elastics to ensure the container of desiccant inside the instrument cannot open during shipping. Also secure the desiccant tray in place with elastics or cable ties to ensure the tray cannot move around during shipping. | ||
brewer_shipping.1778851902.txt.gz · Last modified: by andrew